LED strip lights have revolutionized the way we light up our homes and office spaces, thanks to their versatility and multiple benefits. Whether you’re looking for adding ambient lighting to your kitchen or commercial space, or you need some task lighting for your office, LED strip lights allow you to transform any space with a stylish and cost-effective lighting solution. Plus, no previous electrical knowledge is required to install LED tape, it couldn’t be easier to create the lighting effect you desire.
Simply follow this guide to find out how to install your LED strip lights yourself.
1. Get a Clear Vision
Make sure you have a clear vision of your project and know what you want the end result to look like. Plan where you want to install your driver and dimmer. It is recommended that the LED strip light is installed on a clean, flat surface by using 3M adhesive tape or mounting clips. An aluminum channel is preferred especially for wattage up to 20W/m LED strip light, as it will help dissipate the heat from LEDs and ensure a longer lifespan.

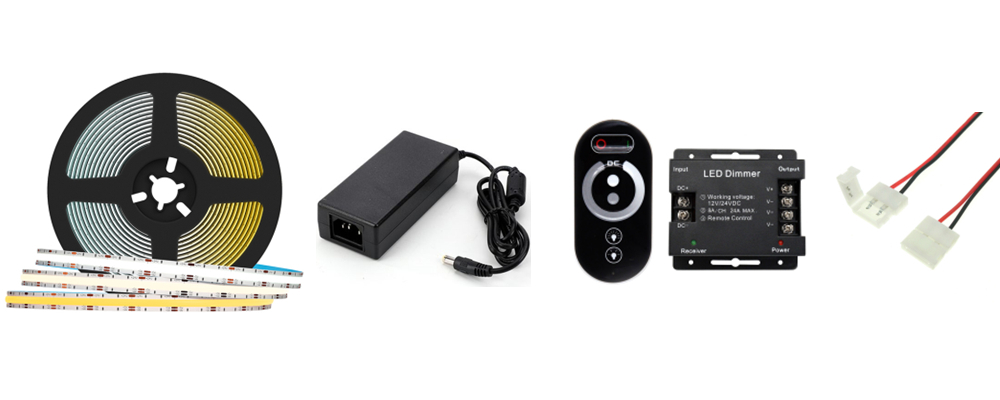
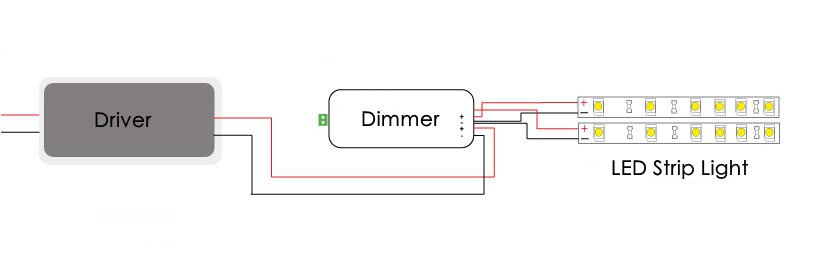
2. Check Components
On a freshly cleaned surface, gently unroll the LED strip lights from the plastic reel and lay out all components:
- Make sure you have everything you need to complete the installation.
- Make sure your power supply is the right voltage to match your LED strips and it can handle the entire load of the LED runs. (Power supply wattage = LED strip light length x wattage per meter x 1.2)
- For longer runs of LED strips, pay attention to the strip’s maximum run length. If you need a run of lights longer than the stated maximum, you may need to install them in parallel from the power source.
- Important Notes: Don’t turn on the light in the reel directly to avoid overheating and LEDs burning.
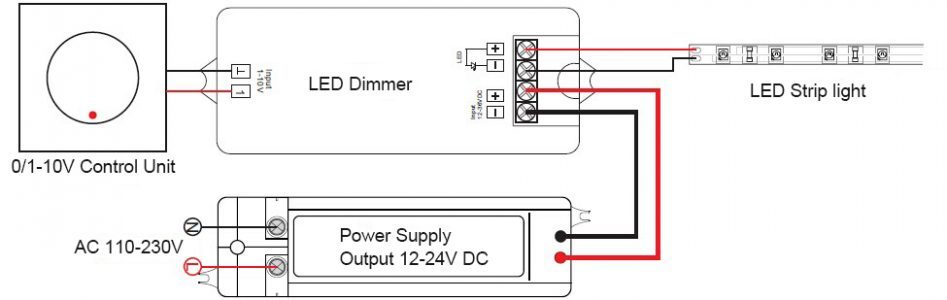
3. Mock Installation
Before peeling the tape or cutting the strip, make sure to complete a mock installation to test and turn on your lights. Connect LED strips to the dimmer and power supply.
4. Troubleshoot If Needed
If the LED strip does not light up, please check your connections and make sure the polarity is matched from the power supply to the LED strip (positive to positive, negative to negative). There are markings on the strip to indicate polarity.

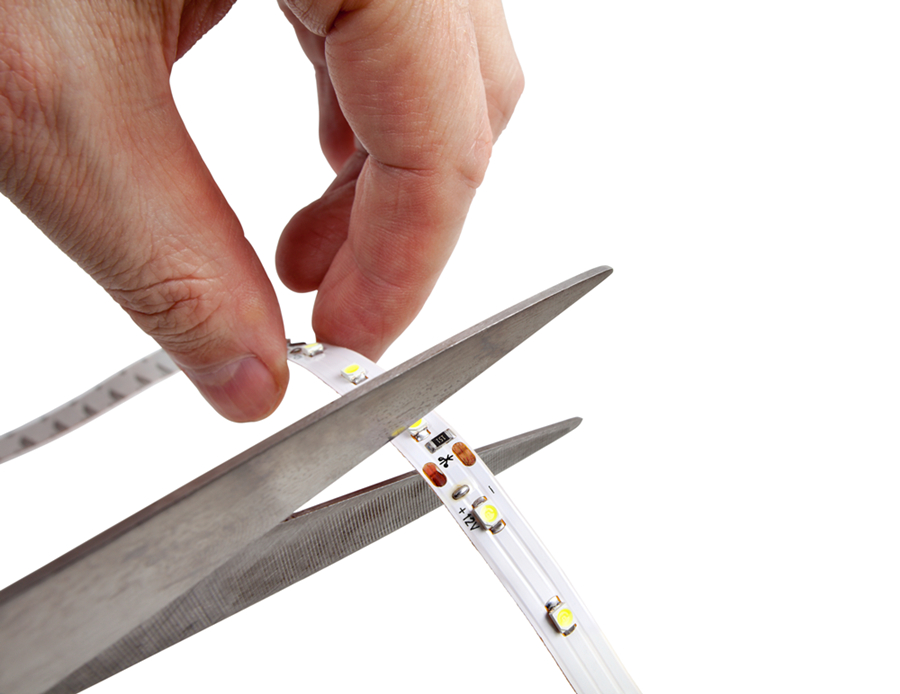
5. Cut the Strip Light to Length If Needed
If you need to cut the LED strip light, measure the length needed first and remember only cut along the indicated cut marks with sharp scissors.
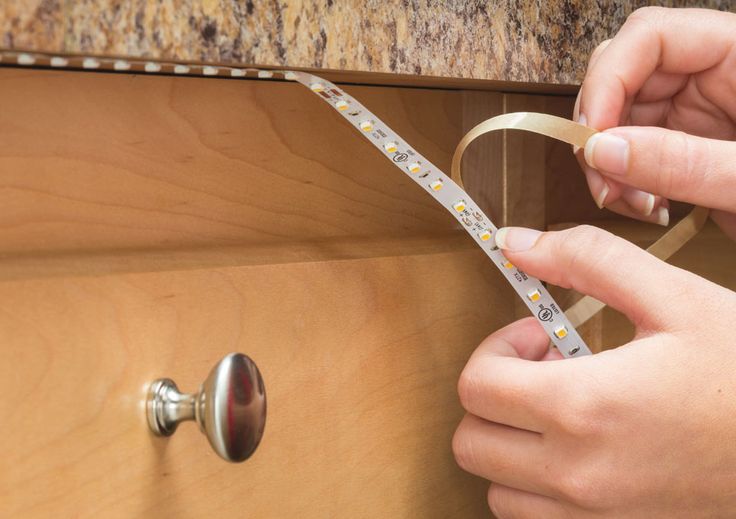
6. Pre-Install Preparation
Thoroughly clean the surface where you will be attaching your LED strip lights with a clean rag. The adhesive backing is strong, but will not stick to surfaces if they are dirty or dusty.
7. Attach the Strip Light
Peel the cover of the adhesive 3M tape a few inches at a time while gently pressing the strip to the installation surface. Make sure the strip is secured on the surface.
8. Complete Full Connections
Complete the connections and wiring between the power supply, dimmers, controllers, or connectors.
Power on the lights. Enjoy your lights!
Conclusion
When it comes to performance, flexibility and energy efficiency, there’s no denying that LED strip lights outperform alternative light sources. This is why it’s critical to embrace them if you wish to get the most out of your options, and also select the most reliable LED strip lights manufacturer.